>Part 2: Cathedral Windows Quilt Tutorial

>

cathedral windows quilt  tutorial

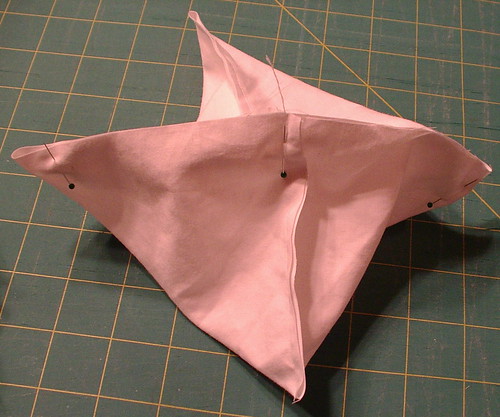
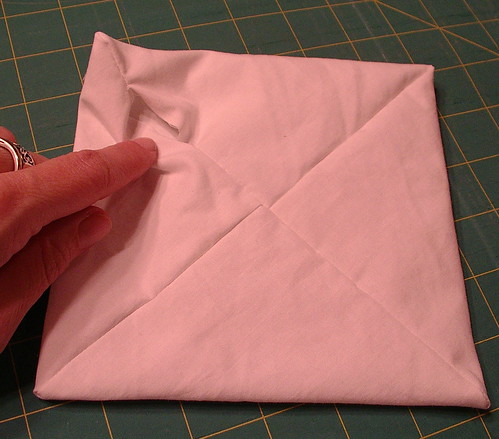
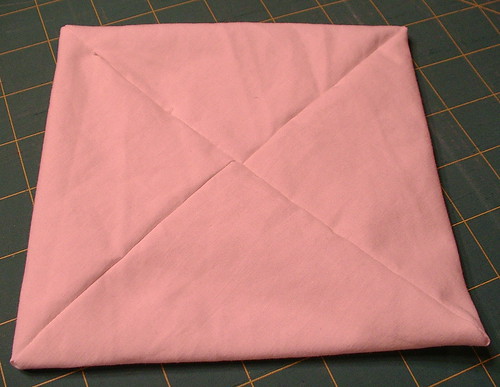
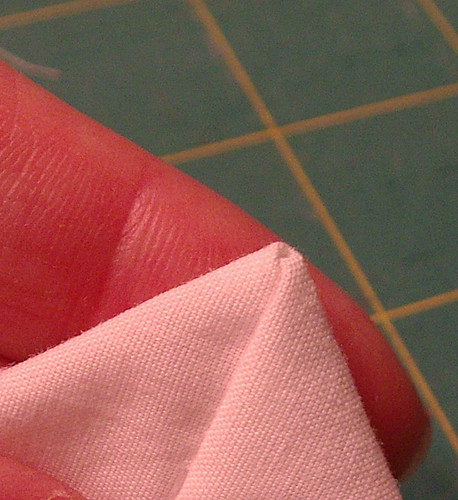
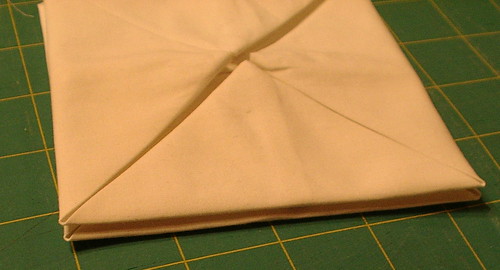
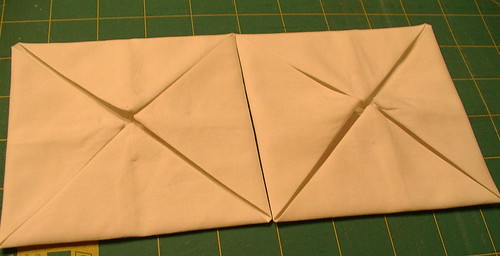
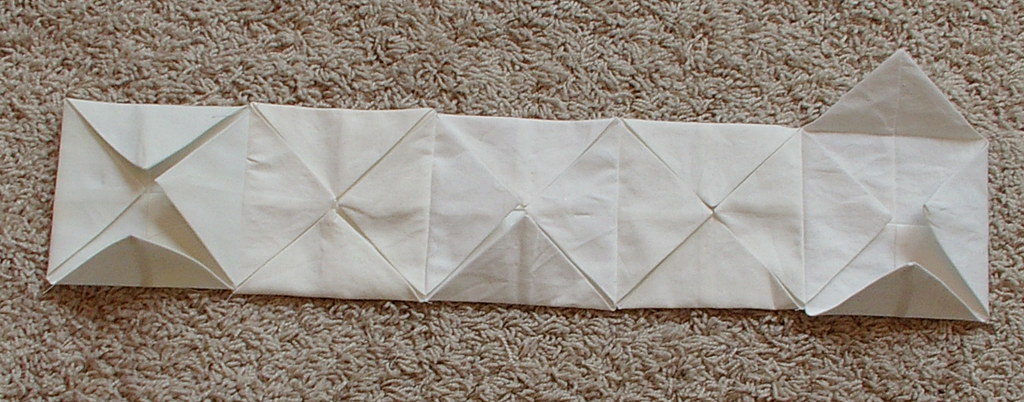
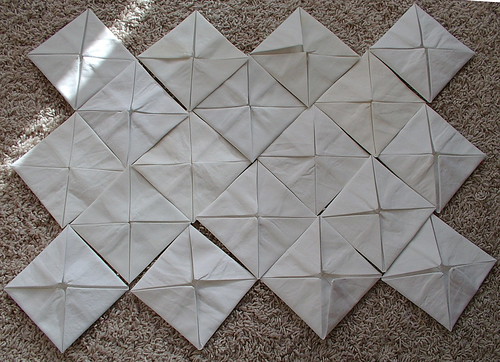
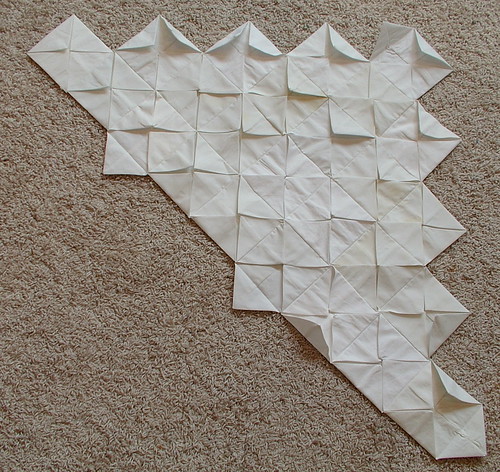
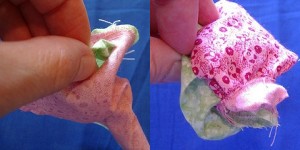
There are two traditional  places to add color to the traditional cathedral windows quilts. The first is shown above which is traditional. The second spot places colored fabric in the long white oval openings as seen in the photo above. But there is actually a third spot to add color which is the background that can be more than one color adding more variety to the blocks.

Quick Traditional method: Easiest
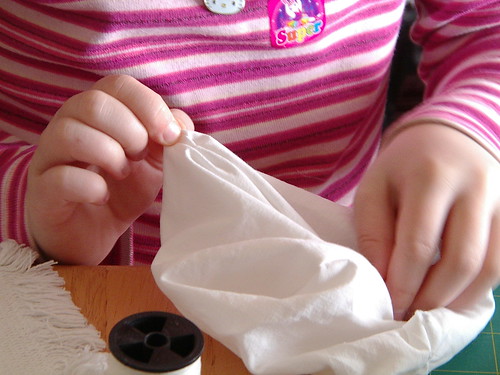
  1. cut 2 1/2 inch squares two for every piece of white fabric you have cut.
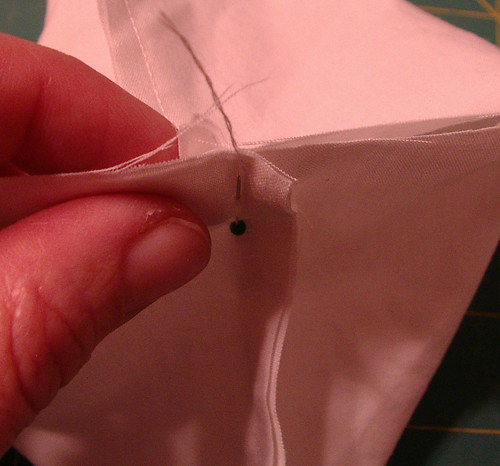
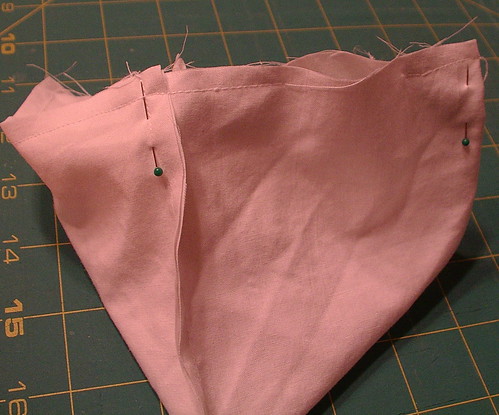
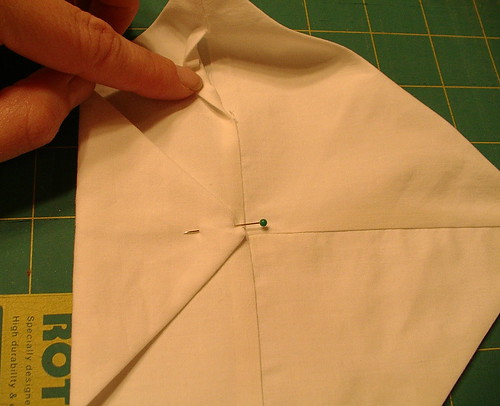
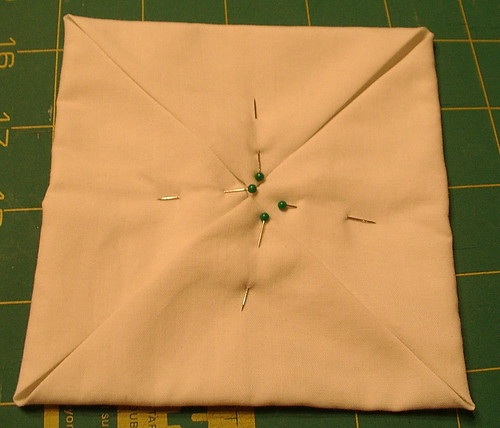
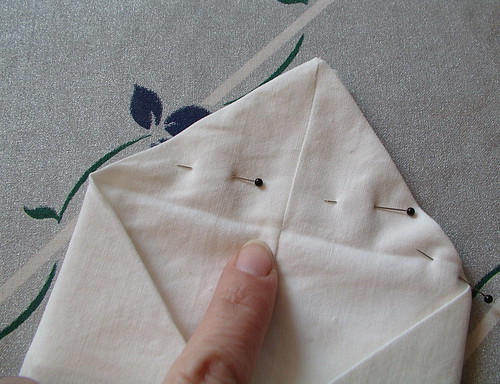
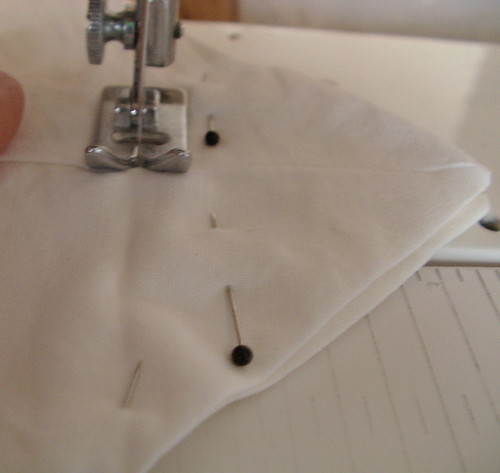
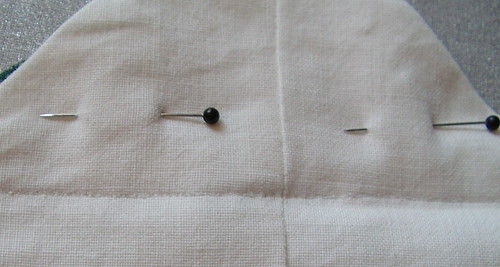
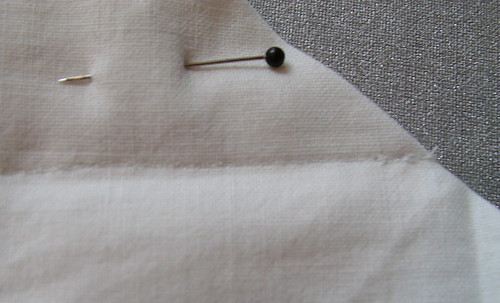
  2. place on space where two squares come together pin in place
  3. fold over edges pin in place
  4. sew with sewing machine
  5. repeat till done
———————————————————————————————-

Optional Steps
I will start with the optional steps method then move on to traditional version 1 and version 2 and version 3.
This will place color inside the spaces that are white in the photo above. This of course is twice as much work if you do it the first way listed below. The second way is faster but not as thick or as warm of a quilt depends on your final goal. These steps that are optional are added to the traditional method not instead of it.
Optional steps if you want more color you can skip this step as I did in the above photo which will make your quilt go tons faster.
Traditional version 1 : Hardest to make
most work but a much warmer quilt (tons more work than traditional)
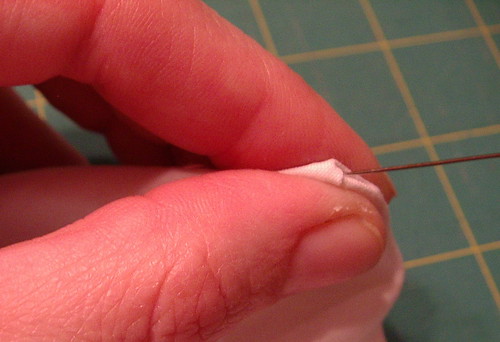
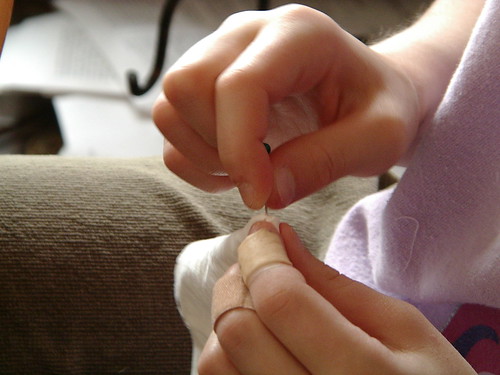
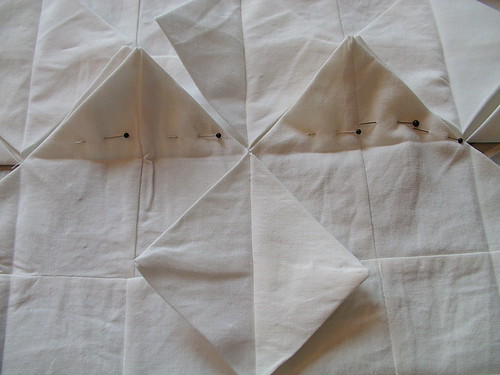
repeat steps 1-6 (from how to construct block)but in color and with a 6 1/2 inch square you will end up with a square that will fit under your flaps of your fabric ruffly 4 1/2 inch square. Stitch corners together by hand and stitch 1 or 2 stitches through the color fabric piece to tack it in place for now.
Traditional version 2: Medium
a little more work than traditional and a little warmer
cut 5 inch color squares of fabric also cut a 4 1/2 inch card stock template. Lay cardstock template over each color square and fold over the 1/4 inch seam allowance on all sides and press in place pull out cardstock and repeat for every 5 inch color square
Traditional version 3: Easy
a tiny bit more work than the traditional and a little warmer
Just cut 4 1/2 inch squares the same number you cut of white squares and place below flaps. Stitch corners together by hand and stitch 1 or 2 stitches through the color fabric piece to tack it in place for now.

—————————————————

Tutorial parts

Part 1 cathedral windows ( background)
Part 2 Cathedral windows ( color filler squares) this post

>Cathedral Windows progress on color

>

some of the color blocks for cathedral windows.

I have been cutting color squares for my cathedral windows quilt; they are sizes 6 1/2 inches square (can also be cut 4 1/2 inches square if you are accurate (if not, somewhere between 4 1/4 and 4 1/2) depending how you sew it together) and 2 1/2 inches square. There are actually two places on the block you can add color. I want to add it to both spots. Once I have everything cut, I will make the second half of the tutorial. I have about 1/2 cut now and hope to have it all cut by Thanksgiving. This has become quite the stash-scrap buster which I am glad of because I have tons of scraps in tons of boxes. This project has emptied a 16-gallon tote of colored scraps; that is so cool to me. That isn’t even counting all the white fabric used which was yards and yards and yards of fabric. I may use the scraps from this quilt to make a strip quilt as well, because I now have lots of pieces of fabric that are long and skinny, less than 2 1/2 inches wide (just not in the way that is shown in the link. I don’t want to sew through paper because that wrecks needles). So, I may just get two quilts out of this.

>Part 1:tutorial Cathedral Windows background

>

cathedral windows quilt tests

After trying about five different ways to assemble this block I think I found the one that works best for my style and personality by using aspects of all the different ways I have tried. So I will do a little tutorial here in case someone else likes this style, then they can use it too. You can use this technique with either machine or hand piecing techniques, or you can do a combination of both.

Supplies:

  • Fabric for back ground and for color swatches
  • Scissors and/or rotary cutter and mat ( I like olfa mats and cutters, but use what you like)
  • Square ruler (9 1/2 inch square and a 2 1/2 inch square) and long ruler if using rotary system ( I like omnigrid for these items, but use what you like)
  • Sewing machine and supplies for it and/or needle and thread
  • Iron and ironing board
  • Glass head pins (so you don’t melt the heads when ironing)
How To:
  1. Cut starting background block; mine are 9 1/2 inches square. I have an 9 1/2 by 9 1/2 omni grid ruler that is those exact measurements, so it’s easy to cut a 9 1/2 inch wide strip out of yardage then use my square to cut the blocks. I cut them four thicknesses at one time. Cut all you need for the quilt so you if this takes you years to complete you do not run out of the same dye lot of fabric. If you keep all your seams accurate, your finished block is 4 1/2 inches and four together are 9 inches square. I am telling you this to help you figure out how many blocks you need to cut. For square layout, divide finished size of quilt by 4 1/2; for on-point layout, divide finished measurements by 6 for how many blocks you will need.
  2. Fold in half and sew both ends with a 1/4 inch seam allowance; this can be done on machine or by hand. I do this in assembly-line style; that way I do all of one side then all of the other.
  3. Open, match center seams, and pin .Sew this seam leaving about 1 to 1 1/2 inch opening for turning; this will not need to be sewn closed in the future because it will be hidden under another fold of fabric. I do this is assembly line fashion, also. Just pick up the needle and slide it over the spot to be left open, then go on with a long chain of blocks. This step can be done by hand, too; just place a knot at the start and stop of the stitching, two per block. No long chain system in hand piecing.
  4. Turn right side out by pulling entire block through the opening left; as you can tell, I have my children helping with this part (a 7- and 9-year-old turned most of my blocks. I did a few as well as my 11-year-old; it is a family thing here).Nnow all seams are inside the block; it is fine to leave the opening open.Pull out corners to a nice point. This is where having children is good; pass this part on to them to do this step. My 11-year-old and I did this part with the needle. I thought it might hurt the 7-year-old.
  5. Press blocks flat. You may not be able to tell in the photo, but I am using steam setting on my iron to do this faster. As you notice, I said press (not iron) because pressing is an up-and-down motion and fabric doesn’t move; ironing is a side-to-side motion that moves the fabric and can make your blocks crooked. Do all blocks in assembly line; it is faster.
  6. Fold points to middle and pin. Notice my opening is still there and will be concealed as soon as I fold that flap down.and press blocks flat. Once again I am using a steam setting. You can skip this step of pinning if you want to stand at the iron and fold the corners down and iron instantly. This will save the time of pinning, but you have to be extra careful not to burn your fingers, especially if you are using steam. Either way works, just a personal preference thing.Do blocks in assembly line; it is faster. Check your blocks after pressing; they should measure 4 1/2 inches square if you have done everything correctly to this point. If you make sure you have all of these done before assembling, assembly goes faster.
  7. Now that you have everything nice and pressed,match up two blocks and match points. Pin these two points together (pointing at fold which is also the sewing line). Sew in pairs; I use a tiny stitch and I back stitch at the beginning and end of a rowthen sew in strips. For on-point (this picture shows six strips all laid out): If doing block/square layout, sew in sets of four to form squares: (This picture shows four sets of four.)

When you have a few rows sewn together, you can start filling in with color. In the next tutorial I will explain how to and where you can place color and how to fold and sew it.

DO NOT USE THIS PATTERN TO MAKE THINGS TO SELL FOR PERSONAL USE ONLY!!!!

update part two isn’t up yet ( update Aug 5 2010) Quilt is still packed and in a storage unit so second part is not done yet sorry.

>Cathedral Windows layouts

>There are basically two types of layout for a cathedral windows quilt; there is on-point and square. Of course you can do both with a tradition notched corner for posted beds. I went ahead and did a few in the next step so I could show layouts for this post. However, I am still actually working on the third seam; like I said, that is the long step. I am leaning toward the on-point version.

Square (example on flicker with color pieces added):

20a layout square

On-point (example on flicker with color pieces added):

20b layout on point

>Seam three, half way done

>I had some help today from my three little girls while doing the third seam on the cathedral windows blocks. I pinned and chain-sewed, and the girls turned and pulled out the corners. We got about 1/2 of the blocks done; this is probably one of the slower steps.

My chain:

chain sewing

Littlest daughter’s helping hands (7yrs) turning to right-side out:

youngest daughters hands

Middle daughter’s helping hands (9 yrs) turning to right-side out:

middle daughters hands

Oldest daughter’s hurt helping hands (almost 11 yrs) (she hurt her hands crashing on a bike at her cousins’ house the other day). She is using a pin to pull out the corners after they have been turned right-side out:

oldest daughters hands

Where they stand at the moment:

sewn turned and ironed

>Two Seams Down

>

two seams down

I have sewn two of the three main seams on all of those cathedral windows blocks I showed in the last post. The blocks are actually white, I am just playing with photos the last few days to see what I can do.

>Start of Cathedral Windows Quilt

>.flickr-photo { border: solid 2px #000000; }.flickr-yourcomment { }.flickr-frame { text-align: left; padding: 3px; }.flickr-caption { font-size: 0.8em; margin-top: 0px; }

472 blocks (9 1/2 inches square), I’m not sure how many I will need for the actual quilt. It is somewhere around 600 and 700, so this won’t be enough for it but it is a good start. Now I need to start the other pieces of fabric that will fit inside of these once they are folded. This stack represents 6 hours of cutting fabric. I can’t believe how much it weighs, and I have yet to cut the color pieces that go into the quilt.

Since it took 6 hours to do 2 blocks (which are sets of 4 squares), I have been doing some math — that would be 3 hours per block set. Also, I still have to cut the filler blocks which, because they will be from scraps, will take about 10 times longer than the white which was from yardage, so 60 hours there. So take 472 squares /4 squares per block=118 blocks *3 hours per set of blocks = 354 hours + 60 hours color squares + 6 hours yardage squares = 420 hours minimum to make this, and probably 7 times that to do it by hand instead of machine (354 * 7 + 66 = 2544 hours) .

If I worked on it 4 hours a day, every day (which is impossible because I have a family and job), it would take an estimated 15 weeks by machine and about 91 weeks by hand, or more. I think this is the definition of insanity, and I guess I like that type of insanity, sort of. There is no way I can take on any project for that long of a time, so I expect this will go into hibernation and out of it, several times.

I am hoping that assembly line techniques like chain sewing and things of that sort speed this up a ton; I will keep you informed.

As I get farther into this, I will post a tutorial.

>Cathedral Windows

>

cathedral windows quilt tests

I decided I wanted to try to make a cathedral windows quilt. I have been thinking about it for a few years now (I have a group on flickr I ad-min all about this type of quilt). I haven’t started one yet. I just played with the technique today. These two blocks are pieced in two entirely different ways (there are actually four blocks that are making up each one of these) . Both ways have pro’s and con’s; I’m still looking for a version I like best. Both of these are entirely machine pieced. I like hand piecing, like in my grandmother’s flower garden quilts; I just don’t want to do it on this quilt. The two samples I made will probably end up as apron pockets or apron bibs. These two blocks, together, are about 6 hours of work from start to finish.

On a side note this type of block has a lot of folding in it like origami does here is a neat site all about origami that my father in law sent me in an email.

>JuSt FoR fUn PrIzE gIvE AwAy

>So, I thought because I missed giving out prizes previously at my 100th post and 200 post (and same goes for the 300th post), I am going to do a drawing for this quilt that I just did the tutorial on. You have to post a comment on this topic. The drawing will be held on July 4th in celebration of the birth of the United States of America. You do not have to be a US citizen to play this game. If there are over 368 comments then I will add more prizes. Let’s see how many posts we can get. All items will be something made by me, Sunshine. If more items are added, I will post their pictures. The idea is to have multiple winners to make up for the other times when I didn’t do a give away. Please leave some way for me to contact you because blogger doesn’t make it easy to contact people who leave comments (such as a flickr address or blog address). Only one comment per person, please. So tell your friends; more people equals more prizes.

My blogiversary is on July 5th, so winners will be announced on that day, and I might do an added surprise on that day as well.

I decided to change this; I will add a new prize every 100 comments. I will do something different at comment number 368. If you are wondering why that number, that is this post number.

Prize #1
front

Prize #2 ?

>Tutorial Mock Cathedral Windows

>

IMGP4350

This is sometimes called an orange peel quilt, and a few other names, too. Whatever you want to call it, it looks sort of like Cathedral Widows.

Supplies:

  1. Template — cd or plate, depending on the size you want (small plates work better than cd size). I did cd size for tutorial; it’s easier to take photographs, but you will get smother rounded sides with a bigger circle (small salad plate or large soup bowl)
  2. Scissors or rotary cutter / mat for fabric
  3. Quilters see through ruler with square grids on it
  4. Scissors for paper
  5. Needle and thread if doing all by hand / sewing machine if doing all by machine / or half and half
  6. Card stock to make square template
  7. Pencil

Directions:

  1. Trace round template onto fabric and cut out (use what ever method you want, such as: trace and cut with scissors or use a rotary cutter and mat with template).
  2. Lay right sides of circles together in preparation for sewing.
  3. Next, either sew by hand or on a sewing machine with a 1/4 inch seam allowance.
  4. Overlap beginning of seam by 1/2 to 1 inch.
  5. Cut a small slit in one side of fabric being careful not to cut through both layers. Make this incision close to where the folded sewn edge will be.
  6. Turn fabric to right side through the small hole you just made.
  7. Put something inside of circle to push all the edges out. The back side of the pencil works well for this.
  8. Smooth out circles.
  9. Iron circles.
  10. Figure out inside square size. As this is different for each person who makes this because of different templates used or not everyone’s seam allowance being the same. I will just reference how to do it. Way 1: Fold circle in half and iron; fold in half again in the opposite direction mating up first iron marks and iron again. The four marks that are left on the outside edges of the circle are the corner points of your squares. Do this to all your blocks. Sew from corner to corner. Make a row as long as your quilt’s finished length will be. Way 2: Place see-through ruler over circle and see what size square will hit all sides, four corners of square at once, and cut that size square out of cardstock. This is your template for inner sewing dimensions of square. Place on all circle and trace. Sew on traced lines as before.
  11. When sewing seams, make sure that the seam you sew will cover the slit you have made when flipped over.
  12. Continue in this manner until you have enough strips to equal the width of the quilt.
  13. Next, start to sew these long strips together
  14. When all strips are sewn together, iron flaps down
  15. You now have a choice: you can either sew the flaps down by hand or with a sewing machine. If you use a machine, you can use decorative stitches; I sewed mine by hand.
sewing down flaps

Finished, you can either sew down side scallops and make a straight edge quilt or leave them, as I have, as scallops for a decorative finish and less work.
Below is what the back of the quilt will look like. Front view is at the top of post.

IMGP4351

There is no batting in this version. If you want batting, use warm and natural and sew it at the same time you do step # 3; trim close to seam and flip as before. This will make the quilt warmer, but less like cathedral windows. This is more of a spring-summer quilt, not a winter-keep-you-warm type of thing. Of course, this is a doll quilt, but you can use the same technique to make a normal size quilt, too.

If you have questions please ask so I can help you understand how to do this.

For an added surprise go here and you may just end up owning this quilt, or maybe another mini quilt I have made. As a celebration of the 4th of July and my blogiversary.

Cathedral Window Quilts. Get yours at bighugelabs.com/flickr

whipup whipup

DO NOT USE THIS PATTERN TO MAKE THINGS TO SELL FOR PERSONAL USE ONLY!!!!