>Part 5: Advent Calendar Button Tree Ornaments

>

hanging on tree
Supplies:
  • 1 yellow button, small
  • 4 green buttons, from small to large
  • embroidery thread
  • 2 needles
  • scissors
  • 3 beads
  • fray check; optional

Order of events:

  1. Make loop in embroidery thread for hanger; thread needles on to the thread tails.
  2. String bead and yellow button (look at picture to see how this is done).
  3. Then string green buttons, from small to large (look at photo for how to do this).
  4. Take other needle, skip bead and thread through yellow button (see picture).
  5. Now, thread through the rest of the buttons, and string on last 2 beads; pass both needles through them (see picture).
  6. Tie knot to finish and hold thread on you can fray check, if you want.
button tree on tree
DO NOT USE ANY OF THESE PATTERNS TO MAKE THINGS TO SELL FOR PERSONAL USE ONLY!!!!

>Part 6: Advent Calender Button YOYO Ornamnet

>

hung on tree

Supplies:

  • button (I used vintage buttons)
  • small yoyo (use what ever you want for the template)
  • needle
  • embroidery thread to sew and use as hanger
  • scissors
  • sewing thread

Order of events:

  1. Make yoyo.
  2. Tie knot in embroidery thread; pass through center of yoyo and back again.
  3. Thread button and stitch on; go through yoyo and button two or three times. Finish with needle on back of work.
  4. Insert needle into yoyo; come out edge of yoyo.
  5. Make loop for hanger; tie off.
  6. Take needle back into yoyo and cut off.
finished

Because I don’t like to post on Sunday, I will post another ornament late tonight for everyone.
DO NOT USE ANY OF THESE PATTERNS TO MAKE THINGS TO SELL FOR PERSONAL USE ONLY!!!!

>Part 9: felt / sequins / big glitter ornamnets

>

cover image

Supplies:

  • felt
  • sequins, any type
  • big holiday glitter (I used snowflakes)
  • beads or any other embellishment
  • thread
  • needle
  • embroidery floss
  • thimble, if you use one
  • scissors

Because I am showing two ways of attaching sequins with and without holes, I made 4 ornaments; two for the giveaway, and two for my tree. This post counts as two ornament posts (you can leave a comment on yesterday’s so that you get your name entered for today and yesterday) one for yesterday and one for today. Feel free to go back and post a comment on any that you haven’t posted on to get the max entries for this giveaway.

Order of events:

  1. Get sequins and felt, and figure out your layout
  2. Sew on sequins/glitter (with sequins, of course, go through the holes).With glitter you are couching the piece of glitter down. Make sure to get a thread that is a close match to the color of your sequin/glitter.
  3. Add other embellishments such as beads (you can do French knots instead of beads; I just like holiday ornaments with more, not less, so I used beads).
  4. Edging; I did blanket stitch for some, and just an angeled stitch (a real wide satin stitch, meaning lots of space between the stitches) for others. Side note: You can make two and stitch them at this point front to back if you have an advent tree that is free standing. This way, no one would see your stitches on the back. I didn’t do this because mine face the quilt, all hanging, and the backs are not seen.
  5. Add hanger and you’re done!

>Part 13: Spool ornamnet

>

on tree

Supplies:

  • craft wood spool or a real vintage one (if you don’t mind adding glue to it; I just couldn’t get myself to do that to my old ones)
  • beads
  • bells
  • embroidery thread
  • scissors
  • needle
  • glue dots

Order of events:

  1. Place glue dots on side of spool from top to bottom where thread would normally be wound (I used 3 dots; it’a hard to see in this photo, the next few are better to see the dots)
  2. Wrap thread around spool making sure to go over tail. Cut thread just past the last glue dot; press thread hard into glue dot to keep thread from coming undone.
  3. String bell.
  4. String spool followed by beads. Tie knot to keep beads from moving. Tie another knot to form hanger; done. The red and green tails haven’t been cut yet in these photos.
side by side
Tails are cut in this last photo.
DO NOT USE ANY OF THESE PATTERNS TO MAKE THINGS TO SELL FOR PERSONAL USE ONLY!!!!

>Revisiting the Advent Calendar

>Last year I posted an ornament a day or so ’till there were enough to make an advent calendar. If you would like to make one for this year, there is still time to get started and completed. You, of course, do not have to make a yoyo tree; any tree will work to place the ornaments on.

advent calender

>Part 2: Cathedral Windows Quilt Tutorial

>

cathedral windows quilt  tutorial

There are two traditional  places to add color to the traditional cathedral windows quilts. The first is shown above which is traditional. The second spot places colored fabric in the long white oval openings as seen in the photo above. But there is actually a third spot to add color which is the background that can be more than one color adding more variety to the blocks.

Quick Traditional method: Easiest
  1. cut 2 1/2 inch squares two for every piece of white fabric you have cut.
  2. place on space where two squares come together pin in place
  3. fold over edges pin in place
  4. sew with sewing machine
  5. repeat till done
———————————————————————————————-

Optional Steps
I will start with the optional steps method then move on to traditional version 1 and version 2 and version 3.
This will place color inside the spaces that are white in the photo above. This of course is twice as much work if you do it the first way listed below. The second way is faster but not as thick or as warm of a quilt depends on your final goal. These steps that are optional are added to the traditional method not instead of it.
Optional steps if you want more color you can skip this step as I did in the above photo which will make your quilt go tons faster.
Traditional version 1 : Hardest to make
most work but a much warmer quilt (tons more work than traditional)
repeat steps 1-6 (from how to construct block)but in color and with a 6 1/2 inch square you will end up with a square that will fit under your flaps of your fabric ruffly 4 1/2 inch square. Stitch corners together by hand and stitch 1 or 2 stitches through the color fabric piece to tack it in place for now.
Traditional version 2: Medium
a little more work than traditional and a little warmer
cut 5 inch color squares of fabric also cut a 4 1/2 inch card stock template. Lay cardstock template over each color square and fold over the 1/4 inch seam allowance on all sides and press in place pull out cardstock and repeat for every 5 inch color square
Traditional version 3: Easy
a tiny bit more work than the traditional and a little warmer
Just cut 4 1/2 inch squares the same number you cut of white squares and place below flaps. Stitch corners together by hand and stitch 1 or 2 stitches through the color fabric piece to tack it in place for now.

—————————————————

Tutorial parts

Part 1 cathedral windows ( background)
Part 2 Cathedral windows ( color filler squares) this post

>tracking code

>e
var gaJsHost = ((“https:” == document.location.protocol) ? “https://ssl.” : “http://www.”);
document.write(unescape(“%3Cscript src='” + gaJsHost + “google-analytics.com/ga.js’ type=’text/javascript’%3E%3C/script%3E”));

try {
var pageTracker = _gat._getTracker(“UA-10144357-1”);
pageTracker._trackPageview();
} catch(err) {}

>Part 4: Advent Calendar : Candy Cane ornament

>

on advent tree

Here is an easy one even the little kids can make (with help from an adult with cutting implements).

Supplies:

  • Variegated pipe cleaner
  • Round item to wrap pipe cleaner around
  • Embroidery thread
  • Embellishments (sequins, ribbon, felt, bells whatever)
  • Something to cut pipe cleaner and embroidery thread

Order of events:

  1. Cut pipe cleaner about 2 to 2 1/4 inches long
  2. Bend around round item to form hook
  3. Cut and tie knot in embroidery thread to make hanger
  4. Add embellishments

DO NOT USE THIS PATTERN TO MAKE THINGS TO SELL FOR PERSONAL USE ONLY!!!!

>Part 1: How to Make a yoyo Advent Calender

>This is the start of a continuing tutorial. This will show you how to make the wall hanging part of the calendar. Then, each day I will post how to make one or more ornaments to hang on the tree ’till I have 25. This way you can make it, too. (Above photo is after star, prior to buttons)

Supplies:

  • Green fabrics (you can use 1 or lots of green fabrics, I choose solid for the tree and variety for the ground) 42 green yoyos tree, 25 green yoyos ground = total 67 green yoyos
  • White fabrics (you can use 1 or lots of white fabrics) ( I used recycled 100% cotton, from my husband’s outgrown Sunday shirts, 2 of them) 86 white yoyos
  • Red fabrics (you can use 1 or lots of red fabrics, I used lots of varieties) 67 red yoyos
  • Brown fabric enough for 1 yoyo
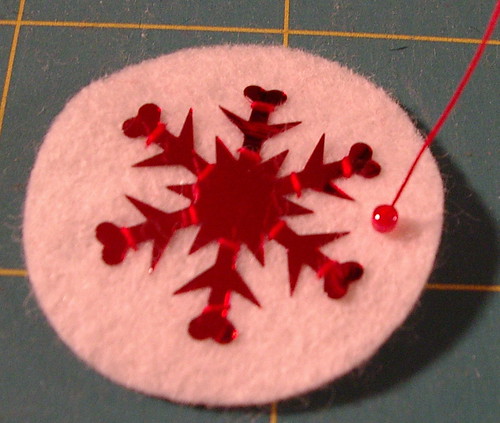
  • Yellow fabric enough for 1 yoyo for star (I used the small clover flower maker to make my star)
  • Standard cd to use as template
  • Thread
  • Needle
  • Scissors
  • Thimble (if you use one)
  • Pencil, optional (for tracing around cd; I don’t do this, but some might)
  • Optional small clover flower maker to use in making the star. You can also just buy a star at a store and sew it on instead of making one.
  • 2- 4 cabone rings ( or other type of ring to use as a hanger)
  • Dowel or other straight item for strength when hanging
  • Bias tape
  • 67 buttons (I used mother-of-pearl, but you can use whatever you want)

Photo to upper right is what the back looks like.

Order of events:

  • Make round yoyos and yoyo star
  • Lay them out in the pattern (shown below in this post)
  • Stitch together in six format, not the 4
  • Add star at top of tree
  • Stitch a button on every green yoyo
  • Stitch on cabone rings (or other hanger item) on back of wall hanging on top row of yoyos; covered by bias tape
  • Stitch dowel (or other straight item) to top back of quilt to help prevent sagging from weight; covered by bias tape

There are 21 rows in this wall hanging.

  1. 11 red
  2. 1 red 8 white 1 red
  3. 1 red 4 white 1 green 4 white 1 red
  4. 1 red 3 white 2 green 3 white 1 red
  5. 1 red 3 white 3 green 3 white 1 red
  6. 1 red 3 white 2 green 3 white 1 red
  7. 1 red 3 white 3 green 3 white 1 red
  8. 1 red 2 white 4 green 2 white 1 red
  9. 1 red 3 white 3 green 3 white 1 red
  10. 1 red 2 white 4 green 2 white 1 red
  11. 1 red 2 white 5 green 2 white 1 red
  12. 1 red 2 white 4 green 2 white 1 red
  13. 1 red 2 white 5 green 2 white 1 red
  14. 1 red 1 white 6 green 1 white 1 red
  15. 1 red 4 white 1 brown 4 white 1 red
  16. 1 red 2 white 4 red 2 white 1 red
  17. 1 red 3 white 3 red 3 white 1 red
  18. 1 red 8 green 1 red
  19. 1 red 9 green 1 red
  20. 1 red 8 green 1 red
  21. 11 red

Stitch all yoyos together and hand stitch star at top of tree. You can do this same type of pattern with English paper pieced hexagons. If you want to use this other technique, go here; there is a tutorial.

Add front embellishments like the star and buttons now. The buttons are for holding the ornaments on the tree. They are also to hold the ornaments on the bottom ground area ’till they are moved up. There are more buttons on the tree than on the ground so you can have more of a choice where to place them.

Stitch two to four cabone rings (or other hanging devises — I used metal belt loops because that is what I had on hand) on top row for hanging purposes. Use four if you don’t use a dowel for strength and to keep quilt from sagging. Once stitched on, cover stitches with bias tape, too, just like the dowel.

Here is the link to make all the ornaments to add to this advent calendar.

DO NOT USE THIS PATTERN TO MAKE THINGS TO SELL FOR PERSONAL USE ONLY!!!!

>Part 2: Advent Calendar: Holly Berries Ornamnet

>

holy berry ornament

Supplies:

  • Felt, green and red
  • Sequins or other embellishments if you don’t want red felt berries
  • Pearl cotton embroidery thread or thread to your liking (colors I used : green:368 red:321)
  • Needle
  • Thimble, if you use one
  • Scissors
  • Optional punches / die cutter

Steps: (sorry; bad lighting in my sewing room I know, but that is how it is)

  1. Draw your leaves and cut out
  2. Use a hole punch to punch out berries (Hint: if you put paper on both sides of your felt, it will punch easier) (Sizzixs also has a die cut you can use that cuts berries and leaves, that is what I did)
  3. Embroider veins on leaves; I used a stem stitch.
  4. Arrange leaves on top of each other
  5. Sew on berries, either felt or sequins or small red jingle bells, beads etc… now. This will also be used to sew all the leaves together while you are stitching on the berries. I used a colonial knot to attach my sequins; you can also use a French knot, instead. The felt berries I just stitch with a single stitch straight up and then down with a little bit of fabric in between the stitches.
  6. Attach hanger to back; I used my red pearl cotton thread to do this.

For other parts of this serious Advent Calendar, go here. I also think this would be cute to use on a baby’s first Christmas set of booties, hat, or on a Christmas sock.

finished
If you find an ornament you don’t like or can’t make, just make two of one of the other ones. I don’t think it will matter if you have more of one ornament than another. Or, just skip one all together.

DO NOT USE THIS PATTERN TO MAKE THINGS TO SELL FOR PERSONAL USE ONLY!!!!

Previous Older Entries